In order to be granted access, the subject must upload a signed Non-Disclosure Agreement (NDA), SF312 form to DISS. You will then need to add this file to the subject’s NDA and NDS History section.
To upload an NDA or NDS into JVS, follow these steps: From the Subject Details tab, click the Accesses sub-tab. The Accesses sub-tab contains sections for the subject’s NDA and NDS History, One-Time Access, Access, and Visits. Click
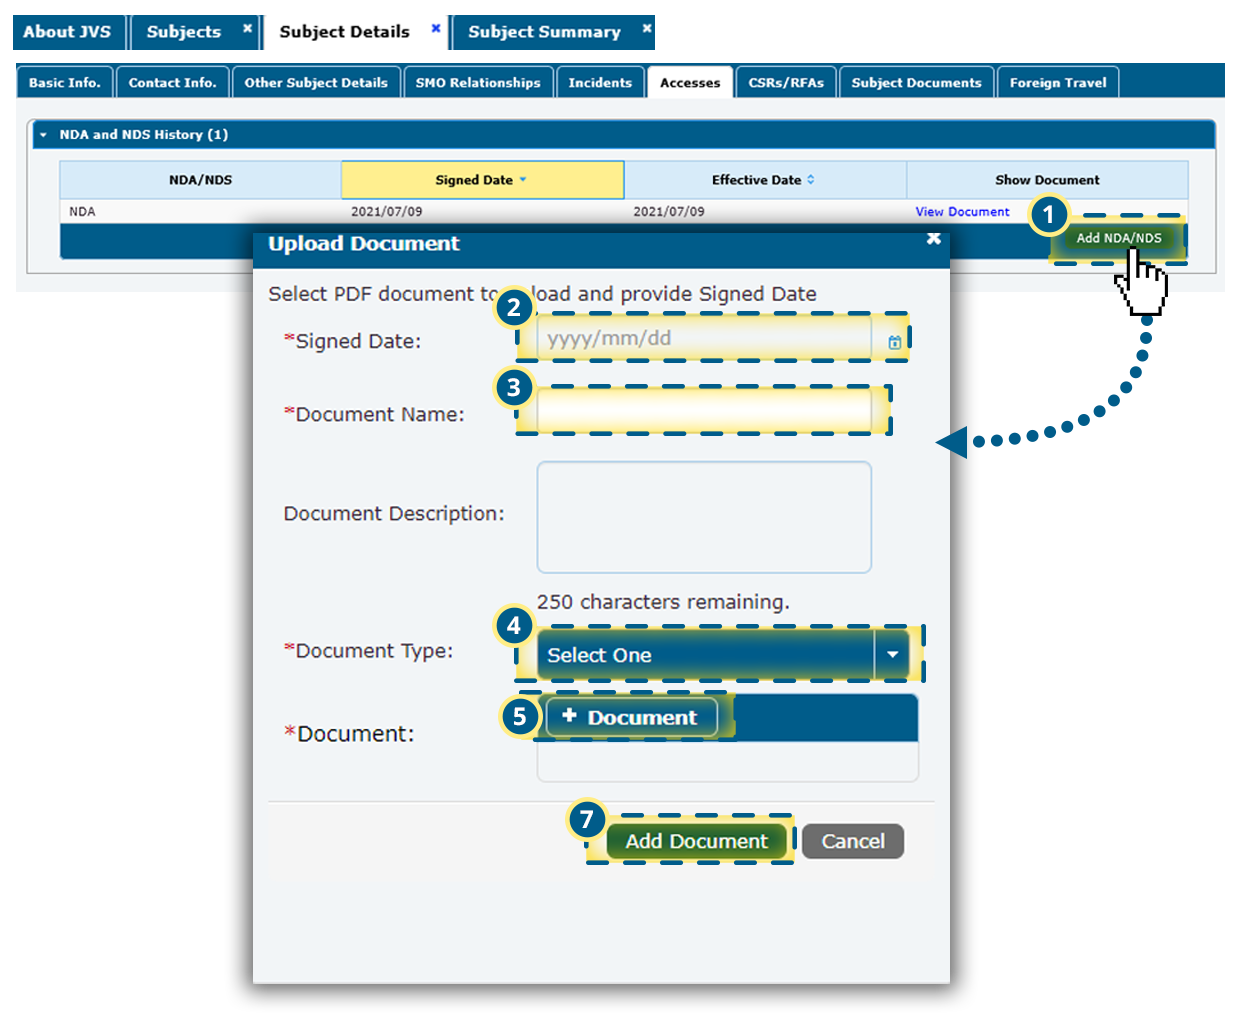
the Add NDA/NDS button at the bottom right of the NDA and NDS History section to launch the Upload Document pop-up window. Fill out the required Signed Date, Document Name, and Document Type fields. You may also type an optional
Document Description. Next, click the + Document icon beside the Document field and browse to the desired NDA or NDS PDF. Click the document to select it, and then click the Add Document button.
When a Security Officer adds an NDA or NDS document while granting a new access, JVS automatically sends an NDA/NDS Review task to CATS. The VRO Industry Process Team (IPT) will either approve or reject the document. Once reviewed, the status
will appear in the NDA/NDS History section. If the document is rejected or revised, the Security Officer must revise the task before resubmitting. If rejected, a message appears in the Task Inbox located in the Communications control panel.